 |
 WWW.SHARCNET-USA.COM WWW.GPSOBSESSION.COM |
|
|
|
 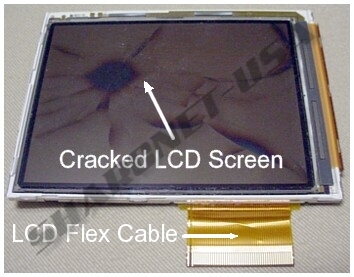 Figure #1: Front View 3.5" Liquid Crystal Display (Cracked/Broken) You�re driving down the road and suddenly your suction-mount falls from the windshield and your GPS hits the dash. You set your GPS on the front car seat and forgot it was there and accidentally sat on it. You're at your front door, juggling for your keys and the next thing you know, your GPS falls out of your hands and hits the sidewalk. You reach for your GPS and look at the screen. It looks like a shattered windshield. You turn it on and find either it no longer lights up or half of the screen is missing or its all just a bunch of random pixels. These are typical situations that we have seen time after time on units that have been sent to us for repair. You go to press a function on the screen but it accesses another function either above, below or to the side of what you actually pressed. You recalibrate the screen and everything works for a while but then later happens again. This is called a "drifting" touchscreen. You go to press the screen and nothing happens. The touchscreen doesn't seem to be responding to your touch. It appears that your GPS has locked up - but has it really? Read on and let's see what's really going on. You might have what is called a "non-responsive" touchscreen. The Display of a GPS Consists of (2) Separate Devices that Work Together. The touchscreen consists of several transparent layers with spacers that are applied with an adhesive to a thin pane of glass. The touchscreen & glass lies on top of the LCD display. The touchscreen & LCD display both have their own flex cables that connect to the main board. 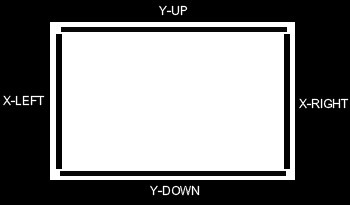 Figure #1-1A: Touchscreen Diagram The touch screen has a ribbon flex cable with 4 or more conductors, each conductor representing a direction such as: 1. X-Coordinate, Left 2. X-Coordinate, Right 3. Y-Coordinate, Up 4. Y-Coordinate, Down Most GPS units use a resistive, analog touchscreen. A voltage is appled to the touchscreen and by pressing anywhere on the touchscreen, it acts like a voltage divider, returning a specific voltage value, based upon the location touched on the screen. The GPS is programmed to read this voltage and it translates it back to a specific position on the screen, which may or may not activate a function. The touchscreen doesn't have to sit directly on top of the display. If you were able to set it beside the display, you could still press the touchscreen and activate a function. The LCD display has no idea where the touchscreen is mounted, all it is concerned about, is what area is being pressed and whether or not that location matches a particular function on the LCD display menu. How to Calibrate a Touchscreen (G-Brand) If your touchscreen has become non-responsive, I would recommend that you try and recalibrate it first, before sending your unit to us to repair. This may or may not solve your problem but it certainly won't hurt to try. 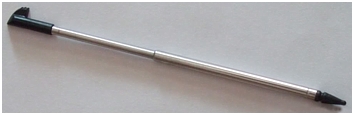 Figure #1-1B: Touchscreen Stylus When we replace a customer's touchscreen, we always use a touchscreen stylus to recalibrate the new touchscreen. A stylus will give you better accuracy during the recalibaration process than a finger. Note: Do NOT attempt to try this procedure if your unit has an assigned PIN. Units with an assigned PIN will prevent the unit from going into mass storage mode until the correct PIN has been entered or until you are at the secure location originally set in the unit. Not being able to access the units drive, prevents us from renaming the GUPDATE.GCD file and accessing the calibration screen directly. Attempting to recalibrate the defective touchscreen with an assigned PIN may skew the calibration so far off, that when a new touchscreen is installed, we won't be able to enter your PIN to access the main menu. (G-Brand) You can access the calibration screen by pressing the "wrench" icon on the main menu and then the "display" icon. Press the "Calibrate Screen" button. If your unit's touchscreen is really miscalibrated or defective, you won't be able to navigate through the menus to even reach the calibration screen. You'll have to access it through a back door feature as follows: (3xx & 6xx Series) - Press and hold down the on/off power button and don't let go of it. The screen will begin to flicker and will say "Pre-boot mode". Keep holding the button down. After some time, you will eventually come to a screen with dots. If the screen says "Loading" and does not go to to the calibration screen with the dots, you will need to connect your unit to a PC with a USB cable and rename the file "GUPDATE.GCD" to "GUPDATE.OLD" from the G-Brand directory on your unit. Once the file has been renamed, repeat the above procedure. Once you reach the calibration screen, now you can let off of the on/off power button. Go through the entire procedure of pressing each dot as it appears on the screen until it says "Done". (2xx/2xxW Series) - Put your finger on the upper left-hand corner of the screen and slide the on/off power switch to the left and hold until you see the calibration screen. (7xx Series) - Touch the screen anywhere and keep your finger there, while moving the on/off switch to left (don't wait for Brand logo to come up - if you did, then you waited to long) and then quickly move the switch the right (lock position). After a short while, you will reach the calibration screen. Go through the entire procedure of pressing each dot as it appears on the screen until it says "Done". (8xx Series) - Turn the Nuvi off. Remove the battery from the Nuvi for at least 10 seconds. Press and hold your finger on screen, while putting the battery back in. The Nuvi will boot-up and you should see the text "Pre-boot Mode" appear on the screen. Continue pressing on the screen until pre-boot goes away and the progress bar appears. Now remove your finger. After a short while, you will reach the calibration screen. Go through the entire procedure of pressing each dot as it appears on the screen until it says "Done". (Nuvi 11xx/12xx/13xx/14xx/16xx/24xx/25xx Series) - Turn off the Nuvi. Place your finger on the upper left-hand corner of the screen and then push down on the power button to turn the unit on. Release the power button when the Garmin logo appears. Continue to press on the upper left-hand corner of the screen until you see the calibration screen. If your unit doesn't recognize your key-presses, then the touchscreen is defective and will it need to be replaced. There is no other way around this. Finally, if you are successful in recalibrating your touchscreen, go back and restore the file "GUPDATE.OLD" back to "GUPDATE.GCD", as this file will be helpful in the future, should your Nuvi's system software become corrupted or missing. All of our touchscreens employ a matte finish that helps reduce sunlight glare. 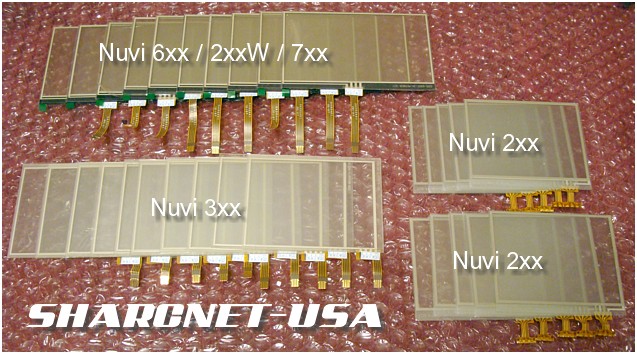 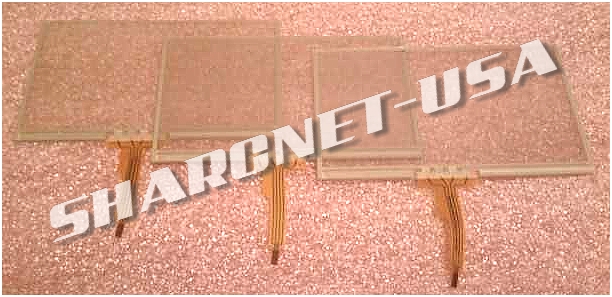 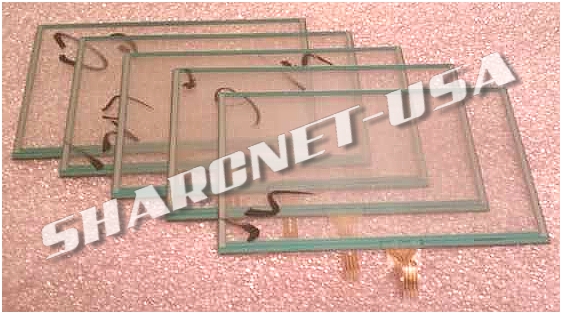 If your unit becomes stuck within the calibration screen, this is a pretty good clue that your touchscreen is defective. You should only have to press (6) dots before the "Calibration Complete" window pops up. If the unit continues to display dots, then the horizontal and vertical resistance values for the touchscreen have drifted beyond the limits within the firmware and you will never be able to calibrate the screen. Your only option is to replace the touchscreen. 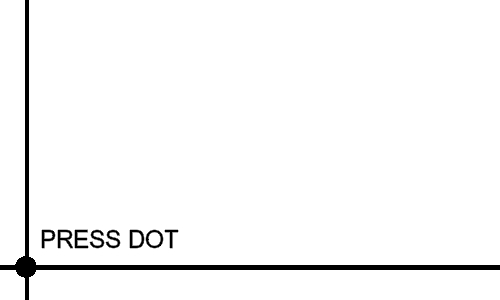 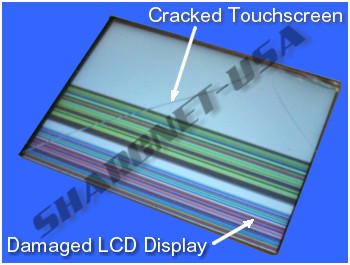 (Horizontal Colored Lines) 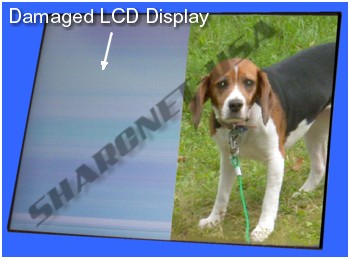 (Half of Screen Missing) 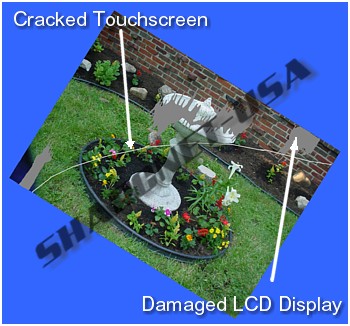 (Grey or Black Splotches in Image) 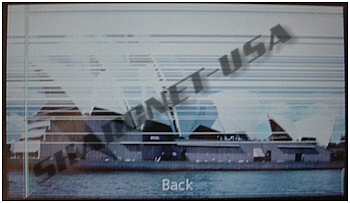 (Washed Out Image with Horizontal Lines)  (White Screen with Black Splotches) 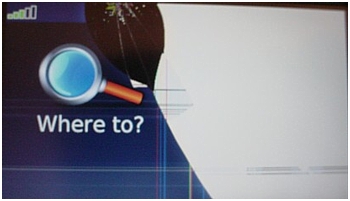 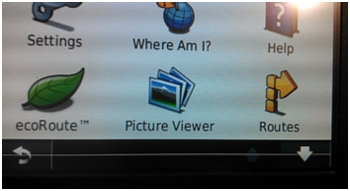 (Vertical or horizontal dotted lines - common in the Nuvi 14xx series) A Defective LCD Display Will Exhibit the Following Characteristics: A Defective Touchscreen Will Exhibit the Following Characteristics: Most people assume that their GPS has locked up when it won't accept any touch commands on the screen, however if you tap or slide the on/off power switch, you'll be able to toggle between screens, proving that the unit isn't really locked up at all. The problem is a defective touchscreen. This problem can not be resolved by upgrading the firmware. If the touchscreen worked for years with an older version of firmware, then why isn't it working now? It's because the touchscreen has failed and can be confirmed by measuring the resistance of the touchscreen with an ohmmeter. A defective touchscreen will show infinite resistance across one or both pairs of leads. We've heard people report that their touchscreen won't work because their battery is bad or weak. A touchscreen is basically just an adjustable resistor (by touch). It draws very little current. In reality, the real power hog of a GPS is the the LED backlight of the LCD display. If there is enough battery power, to power the LCD and the remaining circuitry sufficiently, then how can the touchscreen response have anything to do with the battery condition? We've heard people say that by running their fingernail underneath the edge of the LCD bezel will fix this problem. All this is doing, is applying pressure to the fractured silver ink/paint causing it to momentarily reconnect. However, the problem will ALWAYS return. It's not caused by touchscreen covers, the deletion of the GUPDATE.GCD file or old firmware as others have claimed. It's caused by a defective touchscreen. No matter what may "seem" to fix the problem, the problem ALWAYS return. The correct solution is to replace the touchscreen. Notice: we have observed a high rate of failures on a newer style 4.3 inch touchscreen (6xx series) with a white tail cap, that the LCD manufacturer has been using. We have found this type of touchscreen used with the revised LCD display (LQ043T1DG03A). The touchscreen will just stop working, even though there is no physical damage to the touchscreen or glass. Apparently, the touchscreen connections become broken from the touchscreen tail. The only way to repair this problem is to replace the entire touchscreen/glass. We have also noticed that units with serial numbers beginning with the prefix "12P"(some units) or "13N"or "14V" or "143" have this type of touchscreen installed. We have not seen this problem with the original maroon tail cap touchscreens (used on LCD display LQ043T1DG03) and in units beginning with the serial number of "186". We only use the original maroon style touchscreens for all of our repairs. Please note that this problem is NOT the fault of the GPS manufacturer. There is an outside vendor who manufactures and supplies the LCD displays and touchscreens to the GPS manufacturer. 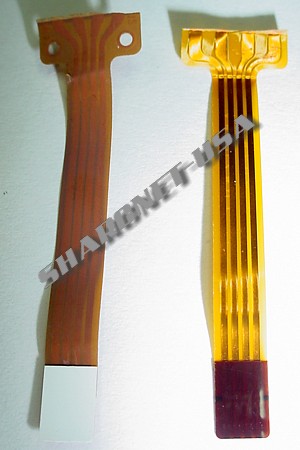 Original Style Touchscreen Tail with Maroon Tail Cap (right) 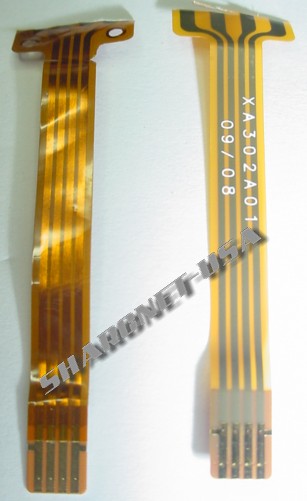 Original Style Maroon Touchscreen Tail (right) 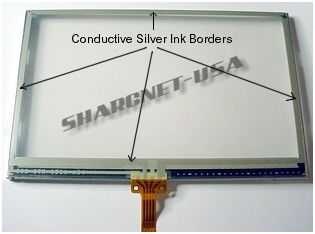 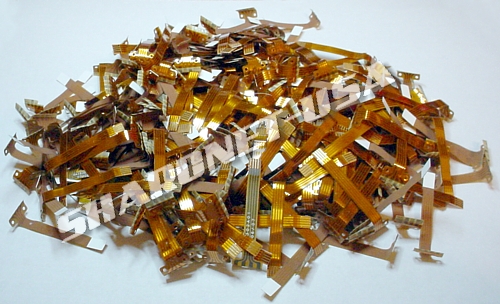 We've Replaced a Lot of Defective Touchscreens! Other Causes for a Non-Responsive Touchscreen: While rare, we have replaced defective touchscreens that were damaged as a result of Pepsi or Coca-Cola spilled under the edges of the front bezel. The cola seeps into the touchscreen and essentially changes its resistance properties, making the touchscreen either drift or become non-responsive. Whenever we see a brown sticky substance all around the inside of the bezel and LCD display, this is a sure sign that the unit has suffered some sort of liquid damage. Cleaning the inside bezel with 99% rubbing alcohol and replacing the touchscreen usually resolves the problem. We Offer the Following Repair Services on GPS LCD Displays & Touchscreens: Please Click [HERE] to See Our Repair Price List. Note to all 2xx(W) & 7xx owners: We have seen (3) different LCD modules being used. The original display uses a (3) flex cable LCD display, while the newer displays use a single flex cable. However, we can replace a cracked touchscreen on any of the (3) displays. Later production units use the single flex cable displays. Your unit's serial number may give a hint at to what type of display is being used. A serial number beginning with (2) numbers, like "17" indicates your unit probably uses an older (3) flex cable LCD module. Units beginning with a number and letter like, "1C" will probably use the the single flex LCD module. We highly recommend that your purchase and use the a friction mount rather than a window mount. WARNING!!! Taking your GPS apart requires the right tools. There are internal flex ribbon cables for the antenna, touch screen and LCD screen. These cables are very delicate and can be torn easily if you're not careful. The antenna flex ribbon cable runs through the swivel antenna shaft and is very delicate. In addition, these devices contain components that are very sensitive to static discharges and can be damaged without using the proper grounding techniques. Please do not attempt to make this repair yourself unless your are qualified to do so. We have received numerous emails from people who have gouged and cracked their GPS's case and permanently damaged their GPS's LCD screen and antenna! Save yourself the aggravation and possible damage to your GPS by allowing us to repair your GPS for you. Please feel free to fill out a Repair Request/Quote Form, which is located at the bottom of the left-hand menu. We'll be more than happy to discuss your GPS problem with you and attempt to offer a possible solution to have the problem resolved.
|


© Copyright SHARCNET-USA - All Rights Reserved
Images are property of their respective owners
This site is not affiliated with any GPS or Digital Camera Manufacturer
We are not a Factory Authorized Service Center